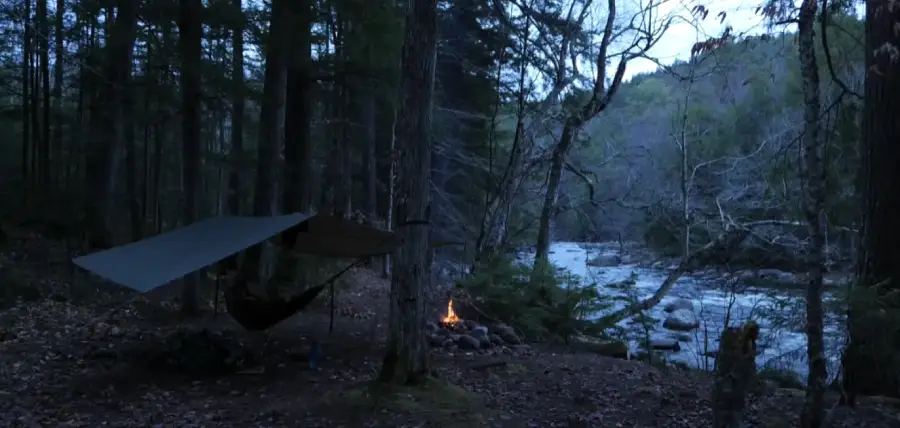
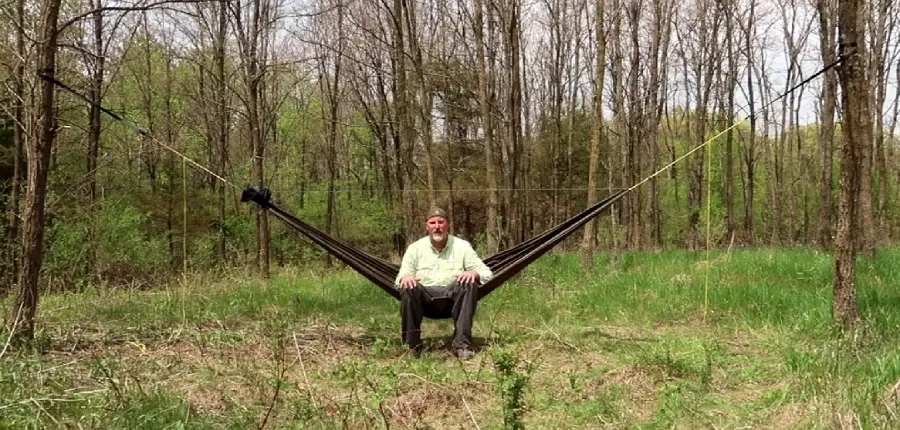
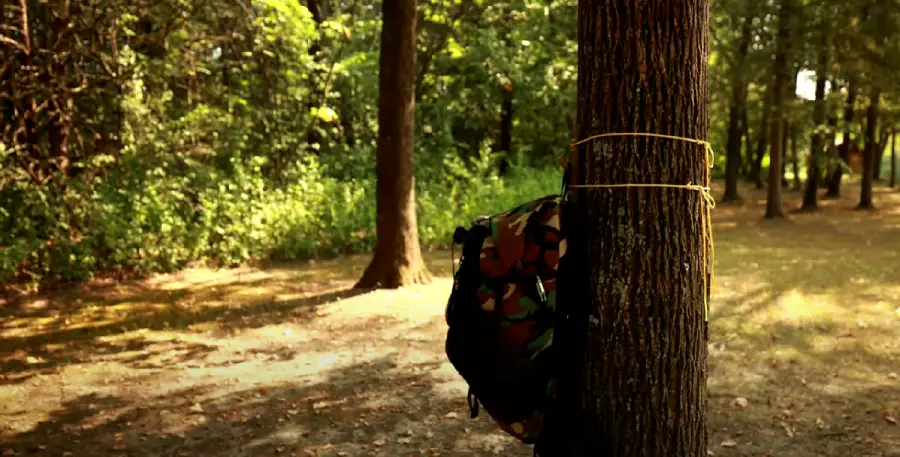
Hammock camping is fun when you do it the right way. After setting up your hammock you need to take care of the protection from different weather conditions. A hammock camp needs protection from 3 elements, Sun, Rain, and Wind. A tarp is the best overhead protection for any hammock camp. Here you can find out the Best tarp for hammock Camping.
An ideal tarp protects you from all extreme weather conditions and makes your camping experience enjoyable. But hammock tarps are available in different sizes, shapes, and different materials, so how do you select the best tarp for hammock camping?
I have been a camper for years, and I know how frustrating it can be to try and find the perfect tarp. While you might think that any tarp will do, this isn’t really the case.
There are a lot of things to consider when buying a tarp. The most important thing that you need to look at is the materials that it is made up of. Most tarps are made out of either nylon or polyester. These materials are cheaper than canvas and vinyl, but they aren’t ideal for hikers who travel a long distance and want to carry limited weight.
| S.no. | Preview | Products | Material | Buy |
|---|---|---|---|---|
| 1 | 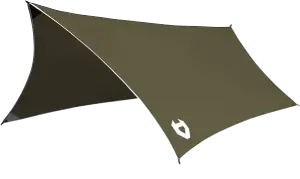 | Rain Fly EVOLUTION | Nylon |  |
| 2 | 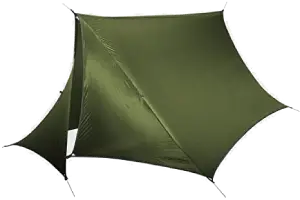 | ENO Eagles Nest Outfitters HouseFly Rain Tarp | Silicone Nylon | |
| 3 | 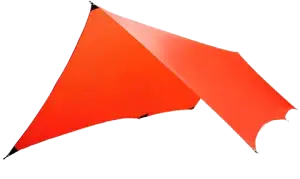 | KAMMOK Kuhli Ultralight Hammock Camping Tarp | Ripstop Nylon | |
| 4 | 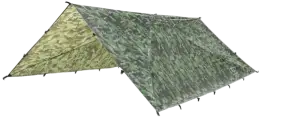 | Gold Armour Rainfly Tarp Hammock | Ripstop Polyester | |
| 5 |  | Aqua Quest Defender Tarp | Nylon | |
Best Tarp for Hammock Camping
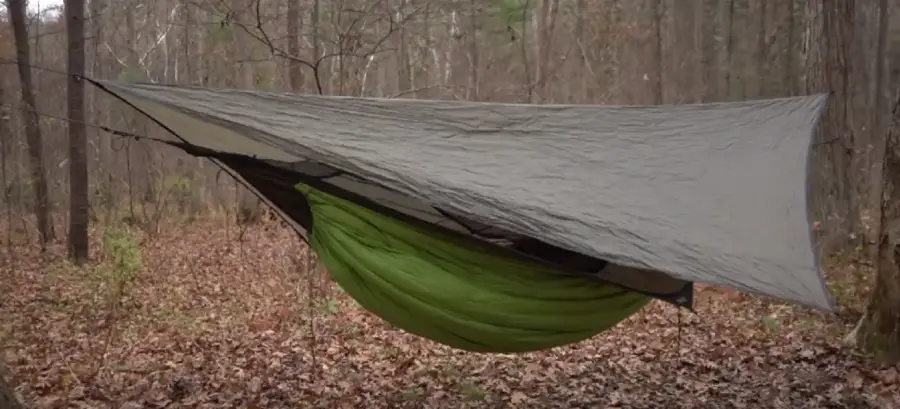
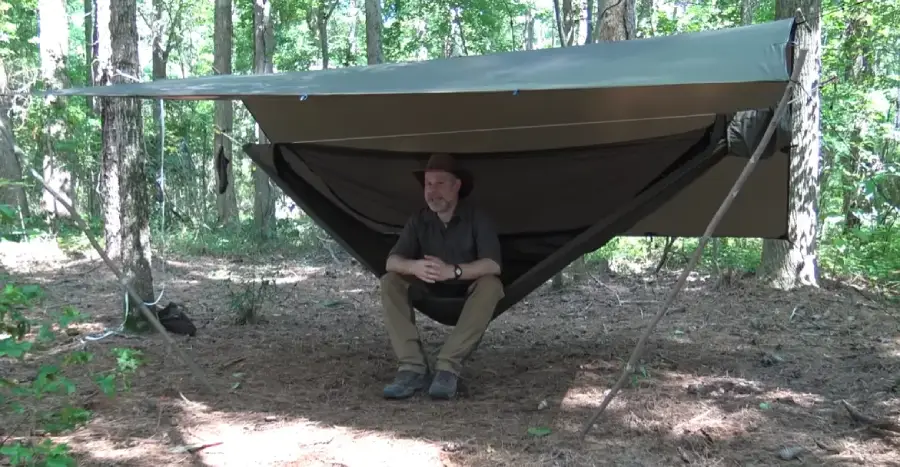
The tarp or rainfly is an extra layer of protection on top of the tent which saves you from the sun, water, and wind. When you’re camping with a hammock, it’s important to protect yourself from these elements. A tarp is essential for this purpose, but there are so many different types of tarps on the market that choosing one can be overwhelming. To help you make an informed decision about which tarp is best for your needs, we’ve put together an in-depth guide on how to choose a hammock tarp.
We have done extensive research and selected the 5 best tarps that are ideal for hammock camping.
1. Rain Fly EVOLUTION
Last updated on 2022-12-23 / Affiliate links / Images from Amazon Product Advertising API
This tarp is made of polyester coated with TPU which makes it waterproof and lightweight. The 12×10 feet tarp weighs only 1.65 pounds (0.74 Kg) less than the weight of your water bottle. It is 10 feet wide and can cover a two-person hammock camp very well. The diamond shape tarp has 4 tie points(2 on each side) to secure the tarp to the ground.
The heavy-duty nylon tarp is double-stitched on the edges and reinforced on the four corners and on the ridgelines.
It comes with one 26 feet long rope to create a continuous ridgeline to hang the tarp and four 10 feet small-size guylines to attach the tarp to the stakes and secure them to the ground.
This wide tarp can be set at a comfortable height from the hammock and yet give full coverage. It gives enough room for a hammock camp and keeps you dry from the rain. Setting up the tarp is very easy and requires no level of expertise. This tarp is enough to cover a 12 feet long hammock from rain or sun.
- It comes with a Tarp and Gear Sack for easy packing and keeping.
- Easy to set up, fold and dry even for beginners.
- It comes with all the necessary kits to set up the tarp.
- Versatile in use.
- Made of durable nylon fabric.
- A Wide tarp is fit for all seasons.
- It also gives UV rays protection.
- A 5-in-1 Survival gear comes as a bonus.
- 21 different color options.
- The guylines are very thin and entangle easily.
- Not ideal for sidewise and heavy downpours.
Recommended For: This Rainfly evolution tarp is recommended for backpackers who prefer a wider space on top yet are light in weight.
2. ENO Eagles Nest Outfitters HouseFly Rain Tarp
Last updated on 2022-12-23 / Affiliate links / Images from Amazon Product Advertising API
ENO housefly tarp is made from silicone-impregnated nylon fabric which makes it durable and lightweight. It weighs only 1.7 pounds(0.77 kgs) and packs really small(the size of a water bottle).
The tarp comes with double stitched sims on the edges and is reinforced on the 4 corners and on the ridgeline. The sims are taped and make it waterproof. It is a house-type tarp with doors at both ends. You can choose to close the gates to retain heat or open them to let the breeze into the camp.
You need 8 stakes, 8 guylines, and one ridgeline chord to set up the tarp completely. You can keep the doors unfolded with the clips on. It allows enough room for changing clothes and privacy.
- It keeps the camp dry and warm.
- The roomy feature makes it spacious and retails heat.
- Packs really small.
- Durable material.
- Does not include stakes for anchoring.
- Expensive in the category of tarps.
- Not enough space to cover 2 hammocks.
Recommended for: This tarp is ideal for campers who need a little room for better heat retention and protection in heavy rains.
3. KAMMOK Kuhli Ultralight Hammock Camping Tarp
Last updated on 2022-12-23 / Affiliate links / Images from Amazon Product Advertising API
This Kammok tarp is hexagonal in shape and made from Ripstop nylon impregnated with silicone. Its edges and seams have double stitching and corners, anchor points, and ridgeline points are reinforced with Hypalon. The fabric is coated with Double Water repellent making it fully waterproof.
This ultralight tarp weighs only 0.625 Pounds(0.28 kgs) or 10 ounces making it the lightest in our list of best hammock camping tarps. It extends to 11 feet in length and 7 ft 4 inches in width. This tarp is easy to set up, with its 8 reflective guyline points you can easily spot it in dark.
Kuhli tarp is versatile and you can create different types of shelter spaces for your camp. It comes with 16 different connection points which you can use to make shelters according to your requirement. You can use it in hammock mode, picnic mode, storm mode, a-frame mode, Awning mode, and Asymmetrical mode.
It comes with a waterproof stuff sack for keeping the tarp and accessories in one place.
- It offers large coverage of the camp area.
- Ultralightweight tarp.
- 16 connection points make numerous shelter designs.
- It’s small to pack.
- A waterproof stuff sack.
- You can use it even on treeless terrains.
- Easy to set up.
- A lifetime warranty against any manufacturing defects.
- Comes with Only 4 stakes included.
- Expensive Tarp.
Recommended for: This ultralightweight tarp is recommended for all hikers who don’t want to carry any extra weight with them.
4. Gold Armour Rainfly Tarp Hammock
Last updated on 2022-12-23 / Affiliate links / Images from Amazon Product Advertising API
Gold Armour tarp is made of ripstop polyester and the fabric is waterproof. If you are looking for a neutral color tarp or a camouflage tarp to go unnoticed in the wild then this is the best fit for you. This tarp is very easy to set up and it comes with 33 different tie-up points. You can create different shelters with this huge no of connection points. You can create shelter modes like picnic, tent, fully enclosed, hammock, A-mode, etc.
It comes with 4 aluminum stakes and six 10 feet guylines for easy setup. This tarp is 2.4 pounds(1.08 kg) and comes with a waterproof stuff sack. This tarp is big enough to give full and extended coverage to your hammock and it can cover two hammocks as well.
The polyester fabric makes it bulky and a little heavier but it is worth it.
It comes in 3 different sizes 10x10ft, 12x14ft, and 10×8 ft other than the 12x10ft. So you have plenty of variety in terms of sizes and colors to choose from.
- Waterproof Nylon Tarp.
- 43 different color options to choose from.
- 4 Size options.
- Big coverage of 2 hammocks.
- It comes cheap.
- It comes with a 5-year warranty.
- A US Based company with great customer service.
- The guylines or tie-up pints need more reinforcements.
- It’s bulky not for lightweight hikers.
- Cheap Plastic tie-up points.
Recommended For: This Gold Armour Tarpis recommended for campers who want more coverage and protection from wind, snow, or rain.
5. Aqua Quest Defender Tarp
Last updated on 2022-12-23 / Affiliate links / Images from Amazon Product Advertising API
This a great trap from a reputed manufacturer who is known for making quality adventure gear. The Aqua Quest tarp is made from 70D nylon fabric with TPU and the fabric is coated with Double water repellent which makes it super leakproof. This waterproof tarp has a double layer of stitching at the edges, the seams are sealed with leak-proof heat tapes.
It weighs around 2.4 pounds or 1.08 kg which is not excellent for hikers who travel long distances but certainly, a great addition for campers and bushcraft who like to camp in hostile terrains.
This is the only square tarp of 10x10ft size on our list and it has very good coverage for any tent and hammock and gives sufficient protection from wind, storms, and sun. It comes with a camouflage color which has very limited visibility in the wild(stealth mode).
It has 19 tie-up pints which allow you to create many shelter combinations like camping mode, tent mode, hammock mode, picnic mode, etc.
It comes in 7 different color options and 5 different sizes 10x7ft, 13x10ft, 15x15ft, and 20×13 ft.
- It is a strong nylon tarp.
- Compact in design.
- Versatile usage for different modes.
- The fabric is made from a weapon-like durable fabric.
- Waterproof.
- Comes with a lifetime warranty.
- It comes with a stuff sack for easy packing and unpacking.
- It’s heavier for ultralight hikers.
- Does not come with any stakes.
- No inside tie-up points on the ridgeline.
- Expensive.
Recommended for: This Aquaquest tarp is recommended for campers and bush crafters who set their hammocks or tents in the snow or rocky areas.
How do I choose a hammock tarp? A Buying Guide
A tarp is a necessity for hammock camping as you don’t have any protection above you while you sleep at night. Rains are hard to predict and they can ruin your hammock camping even in summer. So tarp is good protection for a night of worry-free sleep.
Camping requires serious planning, packing, and preparation. It is important to choose a tarp that will last all these years so that it can be used on future camping trips or other outdoor adventures. Consider how long you are going to use the tarp before buying one. Tarps are made of lightweight materials like ripstop nylon or polyester and will last longer than those made of cotton.
But buying a good tarp that suits your camping is important and here are some factors that need to be considered.
1. What do you need it for
The best question to ask yourself before buying any tarp is “what is the use?” This will tell you about your requirements and you can match if the tarp has those qualities expected from it.
- You are a hiker and you need a tarp that is ultralightweight and not bulky.
- You are a backpacker and require a tarp for protection and should be lightweight.
- And You are a camper who needs a full protection large size tarp.
2. Style of the Tarp
Tarps can be broadly classified into 5 different types based on their shape and design.
- Asymmetrical Tarps
- Diamond/Square Tarps
- Hexagonal Tarps
- Rectangular Tarps
- Winter/Four-Season Tarps
Asymmetrical Tarps:
Asymmetrical tarps are sown parallel and help lay diagonally. These tarps are sufficient for light rains but not for heavy blowing rain. They are faster to set up as they have only 2 setup points. These tarps are lightweight and small to pack making them ideal for ultralight hikers.
Square or Diamond Tarps:
Square tarps offer a fair bit of protection from rain to campers. They are laid in a diamond shape and usually come in a size of 9 ft x 9 ft. Square tarps are not ideal for sidewise downpours as the edges are difficult to keep intact.
They are easier to set up as they have only 2 guy lines to set. As they have less material you need to hang them lower close to your hammock to stay protected from rain. They are a little bulkier than asymmetrical tarps.
Hexagonal Tarps:
The most commonly used tarps are hexagonal in shape. They offer very good protection from rainstorms. They are packable but can be bulkier depending on the size of the tarp. Backpackers, campers, and hikers prefer the lighter version of hexagonal tarps but these are expensive.
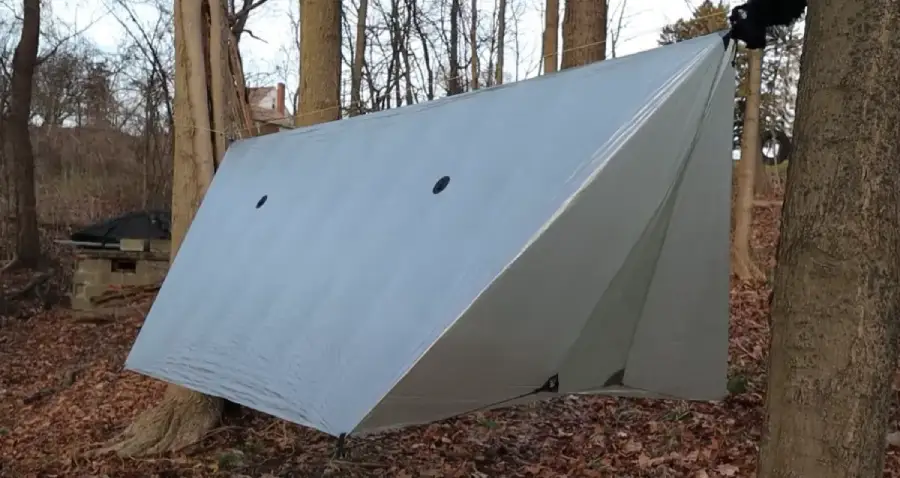
Rectangular Tarps:
Rectangular tarps are plain and ordinary tarps but they provide full side protection. You have to pitch them lower to get full protection in your hammock camp. The straight edges are difficult to keep when there is a wind blowing or during blowing rains. These tarps have more material so they are heavier and bulkier.
Four-Season Tarps:
Winter tarps are called four-season tarps as they work in all seasons. These hexagonal tarps have doors at both needs which gives them a roomy look. The sides hang low eliminating the effects of heavy and side downpours. You get more room and also privacy in your camp to change clothes. The setup takes a little bit longer time and requires some expertise. The weight of the tarp depends on the fabric you choose. They can be heavier or bulkier, and expensive but they are worth it.
Click here for wash care instructions for the hammock
3. Materials
The material of the tarp plays a vital role in its weight, durability, bulkiness, and cost.
Polyester Tarps:
Polyester tarps are waterproof and known as poly tarps. They are ideal for someone who is a beginner and wants to try hammock camping, but doesn’t want to go too far(maybe set up in his backyard). They are available in every hardware store for under $10. These polyester tarps do not stretch but they cover well and provide full protection. But polyester tarps are heavier and bulkier and not recommended for backpackers, especially ultralight hikers.
Silicon Tarps:
The next fabric is Silicone impregnated with nylons called Silnylon. These tarps are lightweight and semi-waterproof. The downside of this material is that it becomes unbreathable when it rains too much.
You could use Silicone Polyester which is waterproof and doesn’t absorb water but it is heavier.
Dyneema:
The last fabric is Dyneema or Cuben fiber which is ultralightweight and almost half the weight of Silnylon. They are waterproof and do not absorb water so you don’t have to deal with extra weight after a good rain. The cost is ¾ times more than nylon. They don’t stretch so no shaggy tent. But Dyneema tarps are exposed to abrasion, so keeping a spare material is wise for unforeseen conditions. They are bulkier than silicone tarps but light in weight. Ideal tarp for ultralight hikers who can afford the cost.
4. Length of the Tarp
The length f the tarp is dependent on the size of the hammock. Ideally, the tarp should extend between 6-12 inches(15-30 cm) on both ends of the hammock. A 10-foot hammock, when laid at a 30° angle, stretches up to 8 feet or 2.4 meters and a 9 feet hammock stretches up to 9 feet or 2.7 meters, so an 11 feet tarp is sufficient for hammocks of these sizes.
5. Width of the Tarp
The Longer and wider the tarps are the better protection it offers. But longer and wider traps are heavier and bulkier because there is more material in them. For backpackers, 10 feet and 11 feet hammocks require 9 and 10 feet tarps respectively. For campers, 10 feet and 11 feet hammocks require 11 and 12 feet tarps respectively.
Read more: 5 Best Hammock pillow for camping
6. Color of the Tarp
For many people, colors do not matter but when you are in the wild colors do matter. Wild animals are curious and if you use a bright or light color it may not get unnoticed. If you are doing stealth camping go for a neutral color or a camouflage tarp. This makes your camp invisible and animals will not notice and pass by easily.
7. Tarp Ridgeline
The ridgeline is the cord used to hang the tarp above the hammock. It is basically of two types continuous loop and end-only ridgeline. The end-only ridgeline is attached to both ends of the tarp and can be tied around the trees. The continuous ridgeline is a single line that runs through the length of the tarp. The tarp can be hung above or below the ridgeline.
8. Tarp Sack
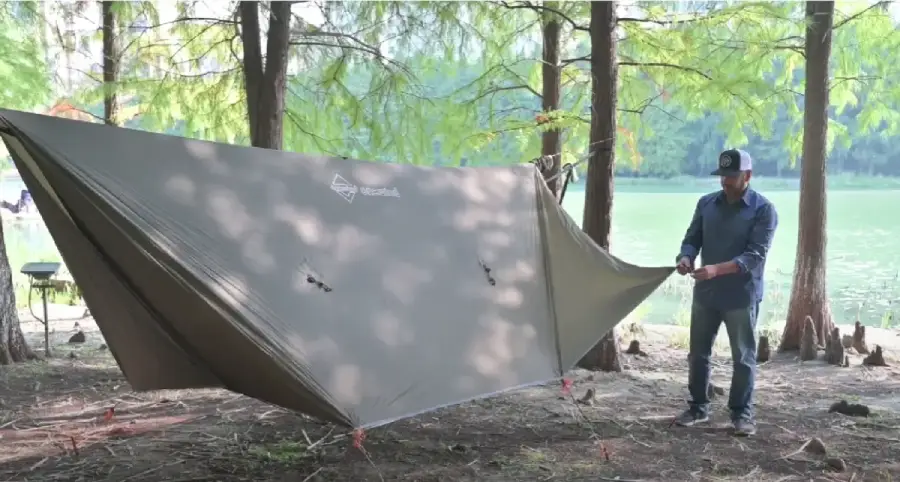
A tarp sack holds the tarp and makes it easier to deploy and pack after use. You can also use a snakeskin sack which lets you view the sky as it holds it together. Deploying the tarp doesn’t take time if it rains suddenly.
FAQs- Hammock Tarps
What is the best size tarp for a hammock?
The best size tarp for a hammock would depend on the length of the hammock. As a rule of thumb, a tarp should extend from 6-12 inches on both sides of the hammock. If you have a hammock of 10 feet long then you need a tarp of 10 feet(considering the effective length of the hammock to be 8.5 feet after hanging). Similarly, an 11 feet long hammock will be ok with an 11 feet long tarp(considering the effective length of the hammock to be 9.5 feet after hanging).
Usually, a good rule of thumb is to measure the area you need to cover and add about 10% for safety.
Do you need a tarp for hammock camping?
You may not need a tarp if you are camping in summer or dry season but to avoid any unexpected rains and thunderstorms a tarp is a necessary tool for hammock camping. If you are a hiker and don’t want to carry extra weight then go for an ultralight Dyneema Tarp. You can also choose a silicone nylon tarp which is lightweight.
Can I use a tarp as a hammock?
No, tarps are for covering the hammock and providing shelter against rainfall, snowfall, and any other extreme weather conditions. They are not meant to be used as a hammock. Any standard hammock can hold weight up to 400 lbs which tarps can not bear. It’s a really bad idea to use a tarp as a hammock.
How do you waterproof a hammock?
To waterproof a hammock you need a good size tarp. A tarp that covers the length of the hammock and has a width of 8-9 feet covers the hammock well. If you need more protection and privacy in your hammock then you can go for the four-season /winter tarp. Hexagonal tarps are generally preferred by campers and backpackers as they hang low and make the hammock waterproof from all sides.
Can I use a tarp as a rainfly?
Yes, a tarp is basically used as a rainfly during monsoon season or any unexpected rains by hammock campers. It gives all-around protection from rainstorms.
What is Tarp Ridgeline?
A ridgeline is a cord drawn between the two trees to hang the tarp above the hammock. The ridgeline can be of two types, continuous or end-only. In the continuous ridgeline, the tarp is set up above or under it. While in the end-only ridgeline the tarp is set right with it because the cords are set at both ends of the tarp.
How do you make a rain-fly hammock?
DIY BUDGET POLY TARP HAMMOCK COVER, HOW TO
Why Trust Us
We have been camping for years now and all products that we review are used and experienced. We test all the adventure gear and products out in our backyard and in the wild. This puts us at a competitive advantage where we can suggest the best gears that work in real-time situations.
Buying a tarp isn’t hard, but you have to make sure you get the right size and material. There are many types of tarps depending upon the shape and material of the tarp. We include the pros and cons of each tarp.
Click here for a Comparision between Hammock Sleeping Pads vs Underquilts
Conclusion
If you have a hammock at home, it’s time to discover the art of camping with it. Hammocks are very comfortable and fun to use, but they can bring some unexpected results if you don’t have sufficient protection in the wild. Using a tarp can give you that extra protection needed to avoid any unforeseen circumstances. If you like our guide on choosing the best hammock tarp please write it in the comments below.